
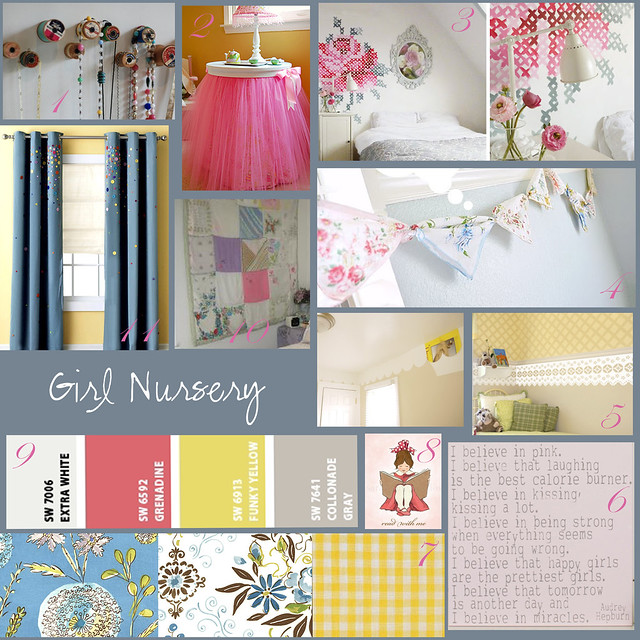
Back in March, before we even knew we were having a girl, I put together an inspiration board for a girl's nursery and I'm beyond excited that I actually get to put it all together! Here's the plan (for more details check out the blog post about the inspiration board):
Today seemed like a good day to get started on the first step. I'm hoping to get all the painting and shuffling of furniture done now while I'm still fairly mobile and it's still cool out and work on the sewing as I get larger and the weather gets hotter (my sewing room is in the basement and stays nice and cool year round).
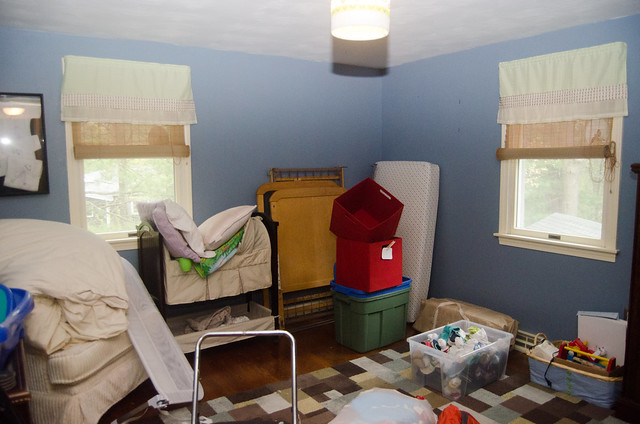
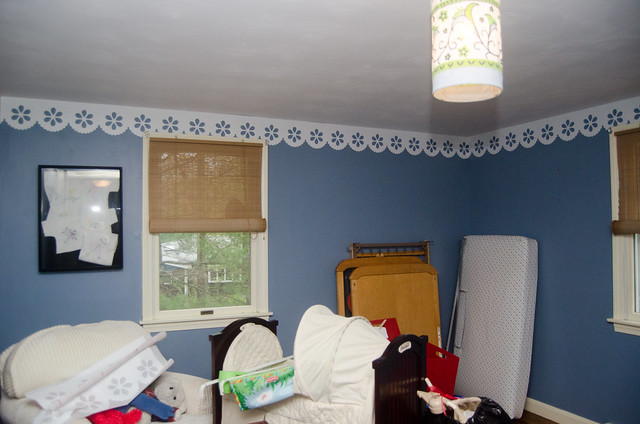
Here's what the nursery looked like this morning (and this was after last weekend's massive clearing out of Christmas wrapping paper, boxes, and baby boy clothes):
I thought I'd start with the eyelet lace border I wanted to add to the walls. More than a year ago I ran across a tutorial for using contact paper and a piece of cardboard to add a scalloped border on the "I Still Love You" blog. I thought it was such a great technique and so cheap and easy too - and you know how I love cheap and easy (no laughs from the peanut gallery!). I love the way this looks but really wanted something with a little more detail to it.
Then I came across some great vinyl lace decals online-
I love how these look but it would have cost almost $200 for enough to go around the room and as I've mentioned before, I'm cheap. So yesterday I picked up a $5 roll of white contact paper at Target. It was 18 inches by 24 feet which was almost the perfect size.
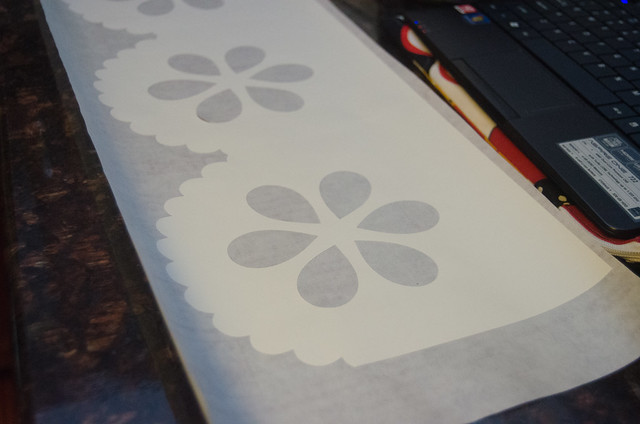
I started by cutting the roll in half so that I had 2 pieces that were 9 inches by 24 feet- the perfect width to roll through my Silhouette SD.

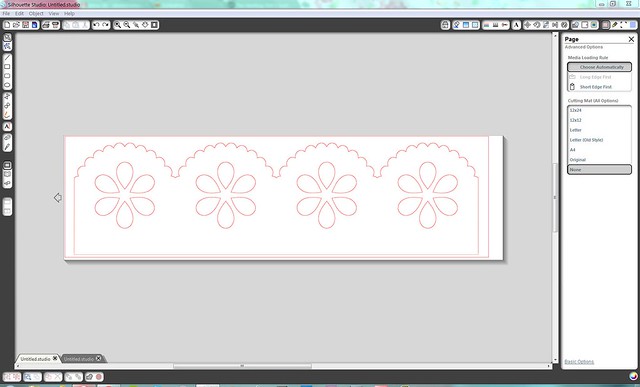
Then, I searched the online Silhouette design store until I found an eyelet lace I thought would work:

Next I used the program to modify the border a bit (I didn't want to spend hours picking all those teeny tiny circles out of my border) and to resize it to just over 27 inches wide by 7.6 inches tall. The Silhouette SD can cut up to 30 inches in length and 8.5 inches wide so this worked out perfectly. The nursery is basically 11.5 feet square so I tried to size it to fit 5 of these on each wall.
Next I used the standard vinyl settings to cut out my contact paper.
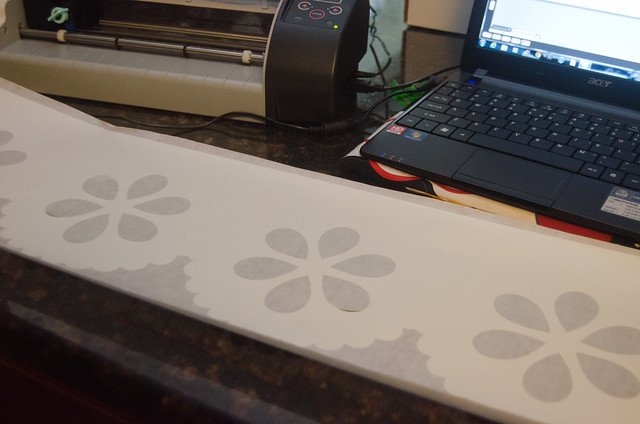
And then picked off the pieces I didn't want.
At first I just cut one section as I wasn't quite sure how it would look. Here's the first strip up on the wall:
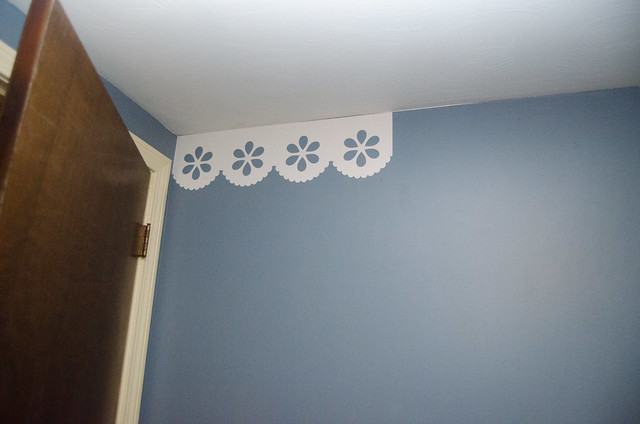
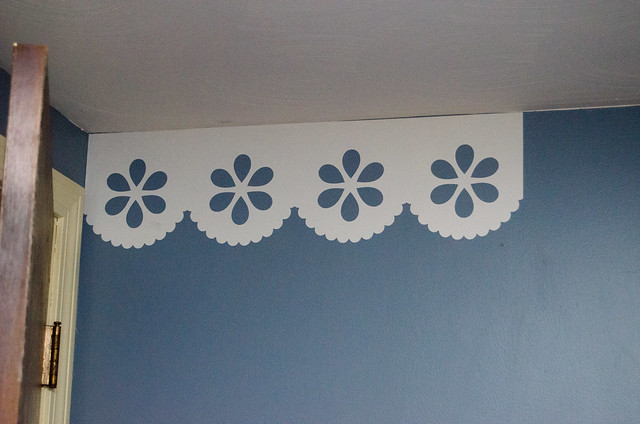
I love it and decided to go ahead and finish the room this way. A couple hours later it now looks like this:
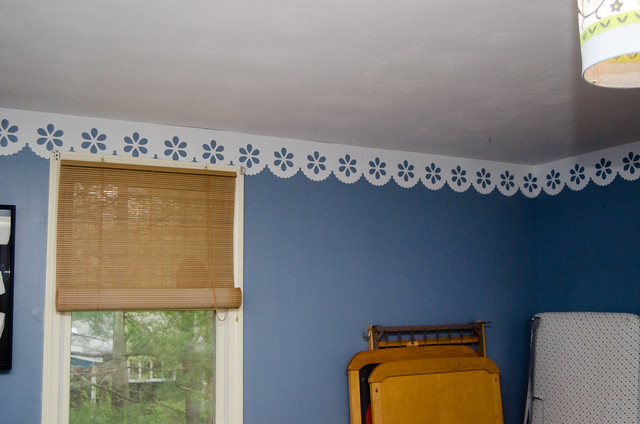
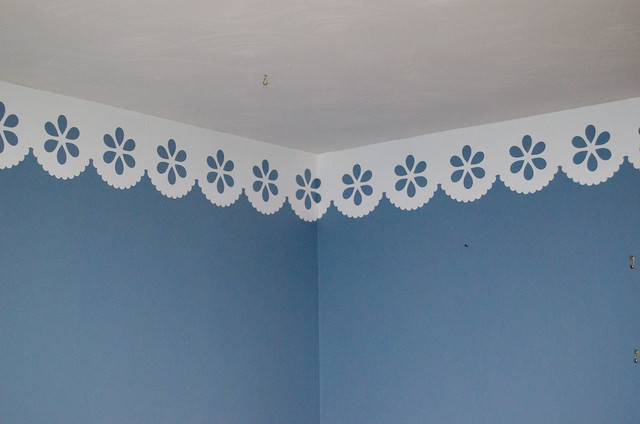
There are a few spots where our ceiling is uneven and the blue paint shows through but I'll just touch those up with a white paint pen at somepoint. The contact paper was actually very easy to get up. The kind I used is removable and I was able to peel the whole piece off of it's backing, line it up with the ceiling, and then smooth out the bubbles with a plastic card. I used a craft knife to trim around the windows. I still have a few more pieces to cut out as I had 2 pieces that ripped going through the Silhouette and 2 that ripped when I was peeling the backing off. Fortunately I have some extra white contact paper in my stash already so I don't anticipate spending any more money on this.
It took me about 4 hours today to get the room 3/4 of the way done. That wasn't 4 hours straight though as I was home with LP so I'd cut a few lengths, play Toy Story a bit, stick a few up, make lunch, etc.
I love how it looks so far and am so excited to work on the nursery more this weekend!
I love how you used the silhouette to make the scallops. Genius! I'm sure it wasn't as much work as hand cutting each one out (like I did).
ReplyDeleteWay to work smarter, not harder.
Also, I loved that you made your scallop more ornate. SO FUN!